Thursday, March 10, 2011

Pizza Cookie


Pizza Cookie   I love to give these as birthday gifts!! They can be pretty expensive to buy at the store, but very inexpensive to make. And who doesn't love a personalized giant cookie?

Things you will need:
  • 1 recipe of Chocolate Chip Cookies dough
  • 15 inch baking stone
  • Parchment paper
  • Scissors
  • 15 inch pizza box
  • Milk chocolate frosting, canned
  • Star decorating tip (#14)
  • Mini M&M's, milk chocolate ones

Begin with your 15 inch baking stone.

15Cover it with parchment paper.

Cover stone with parchment paperPlace cookie dough in center of parchment covered stone.

Place dough in center of parchment covered stone.Using your fingers, spread dough in a circular shape until dough is about ⅜ inch thick.

Spread dough with fingersBake cookie at 375 degrees F for about 15 minutes.

Baked cookieTrim parchment paper to fit into pizza box.

Trim excess parchment paper.Lifting parchment paper, lift cookie and place on cooling rack. Once cooled, place parchment and cookie in pizza box.

Place cooled cookie in pizza box.Using the #14 star tip and chocolate frosting, write your desired message on your cookie. Add star dots around the edge of the cookie.

Write message on cookie with frostingPlace one mini M&M on each chocolate dot around the edge of the cookie to add more color and fun to your message!

Add Mini M&M's to edge of cookieYour Pizza Cookie is complete!! These really are as much fun to make, as they are to give away as gifts!

The Best Banana Pudding


The Best Banana Pudding   My husband loves banana pudding, but it took me several tries before I found a recipe that we all love! This is the best recipe that I have found, and it makes the perfect amount for our family of six. Note that the size of the dish does actually seem to matter when making this recipe.

The Best Banana Pudding
   1 cup sugar
   ½ cup flour
   ½ teaspoon salt
   2 cups milk
   1 teaspoon vanilla extract
   1 Tablespoon butter
   4 egg yolks
   48 vanilla wafers
   5 ripe bananas

   Meringue:
      4 egg whites
      5 Tablespoons sugar
      ¼ teaspoon cream of tartar
      ½ teaspoon vanilla extract

Preheat oven to 375 degrees F. Line the bottom of a 9" x 9" (or 8" x 11") baking dish with a layer of vanilla wafers. Peel the bananas and slice into ⅜” rounds. Cover the banana slices with plastic wrap to keep them from darkening and quickly make your pudding.

Combine sugar, flour, and salt in a bowl; stir well and set aside.

In heavy saucepan, beat the egg yolks well. Alternately, add flour mixture, milk, and vanilla to the eggs. Place pan on medium heat, and stir constantly. Bring to a gentle boil, and add butter when mixture begins to thicken. Continue to stir and remove from heat when mixture has a proper pudding consistency.
Place a layer of banana slices edge-to-edge on top of the vanilla wafers. Pour half the pudding mixture on top, spreading as necessary. Repeat with a layer of banana slices and then pudding.

For meringue, beat the egg whites at high speed until soft peaks form. Add the cream of tartar. At high speed, gradually add the sugar, a tablespoon at a time. Beat until stiff peaks form. Fold the vanilla into the meringue. Spread meringue over the pudding, being sure to seal all the way to the sides of the dish.

Banana Pudding ready for oven
Side view of pudding before going into ovenBake until meringue is brown (about 10-12 minutes) . Serve warm or cold. Refrigerate leftovers. Makes about 8 servings.

Notes:
   When making the meringue, be sure your bowl is completely clean and dry. If your bowl is wet at all, your meringue will not whip properly.
   I calculated the WeightWatchers points to be 10 points for 1/8th of this recipe.

Banana Muffins/Bread


Banana Muffins   This is the best recipe I've found for banana bread, and I simply modified it to make muffins! My family loves banana bread, but I hate the crumbs that get all over, so I decided to make muffins instead of loaves of bread. I found that by cutting the water in half, I got a perfect muffin batter! And best of all... no crumby mess!!

Banana Bread/Muffins
   1 cup sugar
   ⅓ cup margarine, softened
   2 eggs
   1½ bananas, mashed (overripe work best)
   ⅓ cup water
   1⅔ cups flour
   1 teaspoon baking soda
   ½ teaspoon salt
   ¼ teaspoon baking powder

Mix sugar and margarine. Stir in eggs; then add mashed bananas and water stirring well. Add four, baking soda, salt, and baking powder. Put batter in greased loaf pan. Bake at 350 degrees for about 60 minutes or until toothpick inserted in middle comes out clean. Remove from oven and cool on wire rack.

Optional: You may add nuts; pecans are my favorite.

For muffins, decrease water by half. Bake at 425 degrees for about 15 minutes.
Makes 18 muffins.

Note: To get a really moist banana bread, use over-ripe bananas!

Monday, March 7, 2011

Scripture Reading Jars


   If you are looking for help to read your scriptures daily, then look no further!
   This jar is filled with hard candy treats. The poem on top of the jar says:

"Scripture reading can be fun,
When eating treats while it is done!
Pick one treat to suck; don't chew,
And when it's gone, you are through!"
∼ by Kim Bennett ∼

   I used baby food jars for this project. I spray painted the lids pink and then sprayed a clear acrylic spray over the pink. I typed up my cute poem to fit on a 1¼” square label and printed it onto white paper. I used a 1⅜” circle punch to cut out my poems. I used decoupauge to adhere the poems to the tops of the lids. (I have an Epson printer which prints with archival ink that does not bleed. Be sure your ink does not bleed when it's wet.) I found a cute ⅛” ribbon, and used the decoupage as glue to adhere it around the edge of the lid. I filled my jars with Gobstoppers, Lemonheads, Sweetarts, Jaw Breakers, and Sprees!
   I gave these to the girls in my youth group at church! I hope they will remind the girls to read their scriptures each day!
   I was inspired by Dot to Dot's Scripture Reminder Jars. She used gumballs and had a cute poem to go with them. However, I'm not a big fan of chewing gum, so I wrote my own poem. I wanted it to work with any kind of hard candy. I hope you will be inspired by our ideas!

My "Baby" KitchenAid!

Liquid Blender Rod Attachment   I grew up with a KitchenAid stand mixer at my disposal! Yes, I was truly quite spoiled as a child. When I got married, my husband and I first lived in a tiny two room apartment. The kitchen was very small with almost no counter space, so I decided a stand mixer was not a good idea at the time. But what to get? I knew I wanted a hand mixer that would stand up to the thickest of cookie doughs! I was so excited to see that KitchenAid did make a hand mixer. So I got a "baby" KitchenAid and fell in love immediately. It was so cute, and worked great on all my cookie doughs!
   When my first mixer died, I was torn... should I get a large stand mixer or anther hand mixer? I now had the space to get a hand mixer, but I had learned to make all my bread doughs by hand, and loved the hand-kneading experience. So... I decided to get another "baby" KitchenAid. This one even came with dough hooks (which have never been used, as my hands still do the job great).
   Just this past week, my son lost one of my beaters to my KitchenAid. Initially, I was quite upset, but quickly decided that it was a great opportunity to get a new KitchenAid! (The old one was making some strange noises anyway.) I began my search online, and soon found a cute pink one with 7 speeds and on SALE! I quickly made my online purchase.
   It arrived a couple of days ago! I was surprised to see that it came with a "liquid blender rod". What is that you say? It is a milkshake mixer!!

KitchenAid with Liquid Blender RodI always wanted a handheld milkshake mixer, but never wanted to spend the money on it. What a fun surprise it has been! It makes milkshakes in seconds, and you can mix them noiselessly right in the glass you serve them in! We made peanut butter cup and cookies-n-cream blizzards tonight! (Do be sure to cut the PB cups in smaller pieces and crush the cookies up prior to blending them into your blizzard.)
   So if you want a great mixer, but space or money is an issue... get a "baby" KitchenAid! And if you already have a "baby" KitchenAid, you just have to get the milkshake attachment!!

7 speed KitchenAidI know mine will be getting much use this summer!

Note:
   The liquid blender rod attachment must be handwashed, so don't put it in the dishwasher.

Thursday, December 16, 2010

Santa Suit Candy Bar Wrapper


Santa Suit Candy Bar Wrapper   This is a fun gift to give at Christmas! Who doesn't like chocolate? And lots of it when you give this Giant Hershey bar all dressed up for Christmas!
   All my measurements are for a Giant Hershey bar, but you can adjust them for any size Hershey bar.

Giant Hershey bar dressed up for Christmas
Items needed:
  • Giant Hershey bar
  • Red, black, yellow, & white paper
  • Glue pen
  • ⅝” circle punch
  • Button hole paper punch
  • 1⅛” square paper punch
  • Paper cutter with scalloped & straight blades

Cut the following:
  • red paper (1) - use straight blade 9⅝" x 7⅛"
  • white vertical (1) - use scallop blade 1⅜" x straight blade 7⅛"
  • white horizontal (1) - 1⅝" wide one side straight one side scalloped x 9⅝" with straight blade
  • black belt (1) - 1" x 9⅝"
  • yellow square (1) - 1⅝" strip of yellow paper; use 1⅛" square punch to cut out center of belt buckle and then cut belt buckle 1⅝" square
  • black buttons (3) - ⅝" circle punch; use button hole punch twice to make 4 holes

Cut pieces used to decorate Santa suitTake the brown, outside wrapper off the Hershey bar. Re-wrap it using the red paper that you cut. Use a glue pen to adhere the wrapper in the back of the candy bar.

On the center front of the candy bar, glue the white vertical piece with scalloped edges.

On the bottom edge with straight sides together, place the white horizontal piece and wrap all the way around candy bar. Adhere with glue pen in front as well as in back.

Next glue belt buckle onto center of black strip.

With glue pen, adhere belt above bottom white piece with belt buckle centered on vertical white piece. Wrap belt around candy bar and adhere in back as well.

Now glue the three buttons on the white vertical piece above the belt.

Your Santa Suit is done!! Now don't you wish this gift was for you?

Wednesday, October 6, 2010

Frankenstein Fingers


Frankenstein Fingers   We have one Halloween tradition in our home... We make lots of Frankenstein Fingers! These really are the easiest cookies to make, and the "Wow" factor is up there! My kids love to help "paint" the finger nails.
My daugher painting fingernails in her gothic costume.My son helping with to paint fingernails.Frankenstein Fingers
Ingredients:
   1 cup butter, softened
   1 cup confectioners’ sugar
   1 egg
   1 teaspoon vanilla extract
   1 teaspoon almond extract
   green food coloring
   2¾ cups flour
   1 teaspoon baking powder
   1 teaspoon salt
Glaze:
   ½ cup confectioners' sugar
   1 tablespoon milk
   black food coloring

Preheat oven to 325 degrees F. In a mixing bowl, cream butter and sugar. Beat in the egg, extracts, and green food coloring.
In a separate bowl, combine the flour, baking powder and salt; gradually add dry ingredients to the creamed mixture.
Green cookie dough ready for fridgeCover and refrigerate for 30 minutes or until easy to handle.
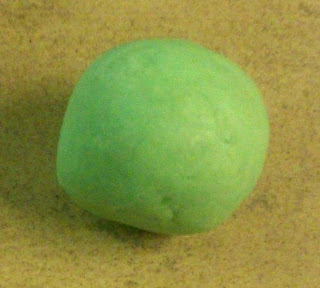
Use a small (1 tablespoon) cookie scoop to form dough into balls.
Form dough into ballsShape balls into 3"x½" long fingers by rolling out logs between your palms. Your logs should be slightly tapered to be smaller at one end... like a finger is.
Roll balls into fingersPlace about 1½" apart on a baking stone or lightly greased baking sheet.

Using the flat tip of a table knife, make an indentation on the smaller end of each finger for the fingernail bed.
Use flate end of knife to make fingernail bedFingernail bed completeUsing the same table knife, make three indentations in the middle of each finger for the knuckle. The more random, the better, so don't make them parallel!
Use tip of knife to make knuckle indentationsCookie is ready to bakeBake for 20-25 minutes or until lightly browned. Cool for 1 minute before moving to cooling rack.
Makes about 5 dozen cookies.
Now we need the black glaze!
Black glazeTo make glaze, mix ½ cup powder sugar, 1 tablespoon milk, and black food coloring in a small bowl. Be sure to mix until smooth.
Use a small paint brush to "paint nails."
Finished cookieOnce fingernails are dry, these tasty fingers are ready to eat!

Notes:
   You can make many variations of these. Just play with different colors! My kids and I like the green/black combination because they look like Frankenstein or alien fingers which are great for Halloween! They also keep in the cookie jar quite nicely... although they are never there for very long.

   If you are into blood and gore for Halloween, try making Frightening Fingers!
Frightening FingersThis was the original "Finger Cookie" that inspired my Frankenstein version. It is from Taste of Home. I revised it mostly because these were not practical to store in a cookie jar. You will need red decorating food gel and about ½ cup sliced almonds to make these.
Make the cookies as above, but omit the green food coloring.
Before the cookies cool and are removed from the baking sheet, squeeze a small amount of red food gel on each nail bed and press a sliced almond over the gel for the fingernail, allowing the gel to ooze around the fingernail.
Remove cookies to a wire rack to cool. You do have to be careful when plating these, so that you don't break all the fingernails. Storing them in a cookie jar is not a good idea either, as the nails break.

   You could also make "pretty fingers" for a girl themed party. Just make the cookies as above, but omitting the green food coloring. Then make a pretty colored glaze (e.g. red, pink, etc.) and "paint" the fingernails. You could even add a licorice ring or use frosting to pipe a pretty ring on each finger!

   I hope you will have as much fun with these as my family does!