Friday, October 14, 2011

Creepy Crawly Spiders


   This idea came home with my daughter from an activity she attended at church. They used big Tootsie Pops and four full size chenille stems. My daughter wanted to make them for her class, so we modified the idea slightly by using mini Tootsie Pops (because I already had a lot of them) and two chenille stems each cut in half.

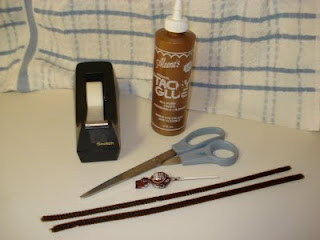
Things you will need:

Things you neeed
  • Mini Tootsie Pop
  • 2 chenille stems (same color as Tootsie Pop)
  • Scissors or wire snips
  • Clear tape
  • White craft clue that dries clear

Instructions:
First, fold both chenille stems in half.
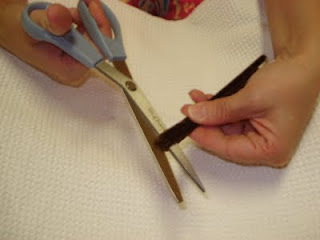
Step 1Cut in the middle.

Step 2Now you have four halves.

Step 3Place the sucker in the middle of chenille stems.

Step 4Fold the chenille stems on one side of sucker up and around the sucker stick.
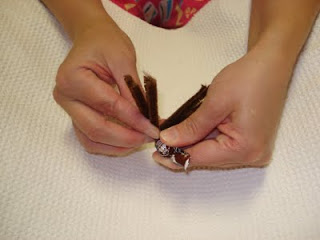
Step 5Fold the chenille stems on the other side of sucker up and around the sucker stick.
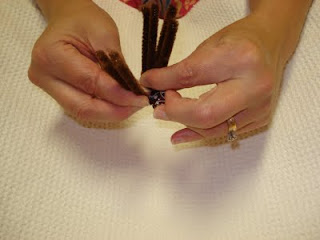
Step 6After folding both sides up and around, you have four chenille stems on each side of your sucker stick.
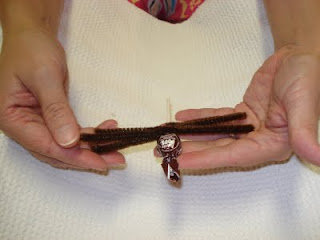
Step 7Top SideNow, with one hand, hold the stick and chenille stems in the middle. With the other hand, shape one set of chenille stems to make spider legs.
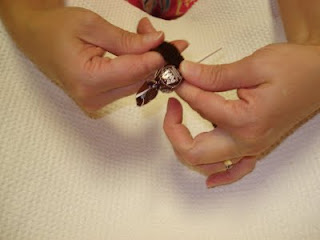
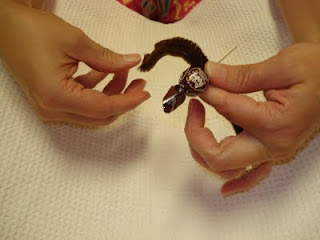
Step 8Legs shaped properlyRepeat the process to shape the other side of legs.

Step 9Still holding the middle, separate the spider legs on one side.

Step 10Step 10Repeat for the other side.

Step 11Now, see that funny piece of sucker wraper that sticks out of the spider's head.

Wraper sticking off headUse a little piece of clear tape to tape it under the head. (I did find that this step can be done first, and it is probably easier to do it first.)

Step 12Now, cut off that ugly white part of the sucker stick off.

Step 13You might notice that the sucker can slide quite easily out of the chenille stems. To prevent this, turn the spider upside down and place some white glue right by the chenille stem and stick.
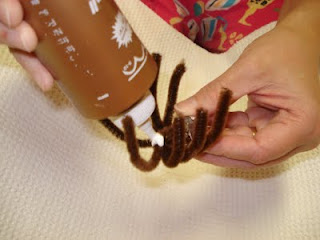
Step 14Leave the spider on it's back to dry overnight.

Step 15In the morning, you have a cool, fuzzy spider that stays together!

Finished SpiderYou can make them in a variety of colors!

Colorful SpidersMy children's classmates enjoyed playing with these cute treats!

Sunday, June 26, 2011

Lemon Slush


Lemon Slush   I just got back from Girl's Camp where I discovered a new favorite treat... Lemon Slush! It is so yummy on a hot summer day, and so easy to make. Thanks to Sabrina Stanley for sharing the recipe with me, so I could share it with all of you. I did find that I had to half the original recipe, as I do not have a huge freezer like they had at camp. Here is the recipe already halved which will work best for most regular sized freezers.

Lemon Slush
Ingredients:
   8 cups water
   1 cup sweetened lemonade mix
   1 cup sugar

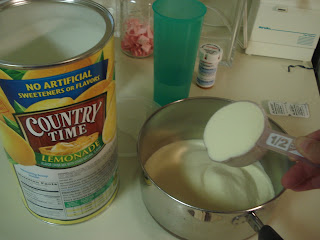
Place sugar,Add 1 cup sugarlemonade mix,Add 1 cup lemonade mixand 2 cups of water in a saucepan.

Add 2 cups of water
Place over medium high heat, and stir until sugar and lemonade mix are dissolved.
Heat until dissolvedRemove from heat and set aside.

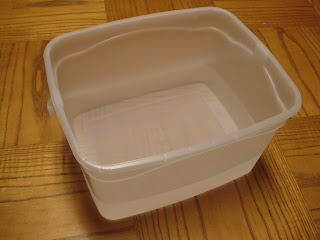
Place 6 cups of water in a freezer safe tub. (I found a 1 gallon ice cream tub was the perfect size for this.)
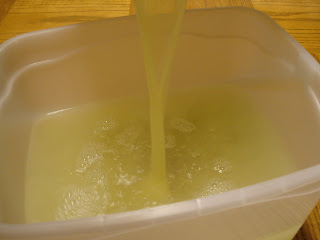
Put 6 cups of water in tubAdd the lemonade mixture from the saucepan to the tub of water,

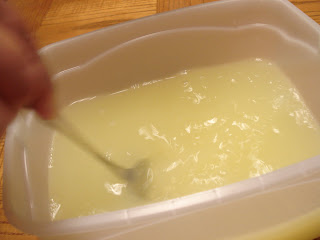
Add lemon mixture to tub of waterand stir until mixed well.

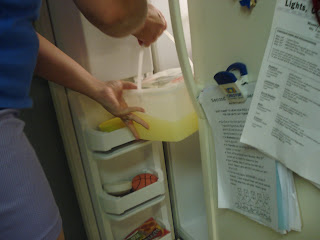
Stir wellPlace lid on tub and set in freezer.

Place in freezerAfter 2 hours, remove from freezer and stir. Return to freezer for another hour. Remove and stir; return to freezer for another hour. Continue to check the slush every hour and stir it.

It took my slush about 8-10 hours to freeze well. Freeze times will depend on how cold your freezer is. I found it works best to start this first thing in the morning on a day when I plan to be home.

Notes:
  • It is important to stir the slush each hour. If you skip the stirring, your slush will freeze solid and then you will have to shave it with a heavy duty spoon or ice cream scoop. This is very labor intensive and time consuming. (Yes... I learned this the hard way on my first attempt at making this recipe!)
  • You can use any sweetened drink mix in place of the lemonade mix to create a different flavored slush! Have fun experimenting!

Tuesday, May 24, 2011

Taco Pancakes

   My husband does not often ask me to cook or bake certain foods. But once in a while, he finds a recipe that really looks good to him. He usually has quite the eye for spotting a good recipe. This is one that he saw in the newspaper. I gave it a try, and most of my family loved it! That is a good sign, as it is usually hard to please all of them every time. This recipe is from Stephanie Parker who writes the Plain Chicken blog.

Taco Pancakes
Ingredients:
   1 lb. ground beef
   1 pkg. taco seasoning
   ⅔ cup water
   2 cups Monterey Jack cheese, shredded
   ¼ cup diced pickled jalapenos
   1 cup self-rising corn meal
   ½ cup flour
   2 eggs
   2 cups buttermilk
   ¼ cup vegetable oil
   Salsa or taco sauce
   Sour cream
   Lettuce

Brown beef and drain. Stir in taco seasoning and water; simmer 5-10 minutes. Set aside.
In a bowl, whisk together corn meal, flour, egg, buttermilk, and oil. Stir in taco meat, cheese, and jalapenos.
Heat a lightly oiled griddle or frying pan over medium high heat. Pour ¼ cup of batter for each pancake onto griddle. When bubbles begin to appear on the surface, flip the pancake with a spatula, and cook until browned on the underside, about 1-2 minutes more.
Serve stacked and topped with salsa, sour cream, and lettuce.
Makes about 20 pancakes.

Note:
If you don't have buttermilk, make your own. (Click "buttermilk" to learn how.)

Homemade Buttermilk

   Buttermilk is not something I keep on hand. But every once in a while, I need it for a recipe. It is quite easy to make.

Homemade Buttermilk
Ingredients:
   Lemon juice
   Milk

Place 1 tablespoon of lemon juice in 1 cup milk.
Let it sit for about 5 minutes.
Tada! Buttermilk... ready to use!

Saturday, May 21, 2011

Sugar Cookies


Sugar Cookie   I have found the perfect sugar cookie recipe! Forget about that long chill time in the refrigerator. These are ready to roll and bake as soon as the dough is mixed up. My kids love to "paint" the cookies after they cool! Thanks, Betty Crocker, for this awesome recipe!

Sugar Cookies
Ingredients:
   1½ cups powdered sugar
   1 cup butter, softened
   1 teaspoon vanilla extract
   ½ teaspoon almond extract
   1 egg
   2½ cups all-purpose flour
   1 teaspoon baking soda
   1 teaspoon cream of tartar

Mix powdered sugar, butter, vanilla, almond extract, and egg in large bowl. Stir in remaining ingredients.

Heat oven to 375 degrees. Grease cookie sheet lightly or use an ungreased baking stone. Divide dough in half. Roll each half ¼ inch thick on lightly floured surface. Cut into desired shapes. Place on cookie sheet or baking stone, and bake 7 to 8 minutes or until the edges are light brown. Cool on wired rack. Decorate as desired.

Notes:
  • My kids love to decorate "Easter egg" cookies. Just make a lot of glaze... all different colors, and layer your designs on!
    Easter egg Sugar cookies
  • I like to use small cookie cutters. It makes cute bite sized cookies, and makes the rolling out go much faster.
  • If you do find the dough too soft to roll out, you can chill it until it is a little stiffer. (I wouldn't chill for more than 30 minutes if you're planning to roll them out right away. If you chill them longer, your dough will be very stiff, and you will have to let it softened back to room temperature.)
  • You may sprinkle with granulated sugar before baking, or after cooling.
  • You can paint the cookies after they are cooled with a glaze made out of powdered sugar and milk (food coloring can be added).
  • I found this recipe in Betty Crocker’s Creative Cookies book.

Sunday, April 24, 2011

Yummy Pink Stuff


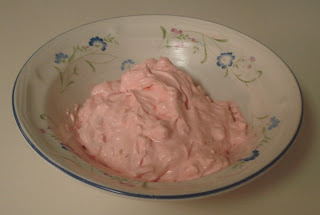
Yummy Pink Stuff   This is so yummy! Hence, the name "Yummy Pink Stuff"! My brother-in-law's mother brought this to Easter dinner today, and it was a huge hit. I'm a pineapple lover, so you know I had to love it! It is a family favorite at her house. (Thanks, Margie, for sharing the recipe!)

Yummy Pink Stuff
Ingredients:
   1 small package strawberry Jell-O
   8 ounces sour cream
   12 ounces Cool Whip
   1 can (20 ounce) crushed pineapple, drained

Place crushed pineapple in strainer and allow to sit and drain.
Whisk together Jell-O and sour cream until well blended. Add Cool Whip and whisk until blended. Fold in drained pineapple.
Chill until ready to serve.

Notes:
You can use any flavor Jell-O.
Sugar-free Jell-O works, too.

Thursday, April 21, 2011

Edible Bird's Nest


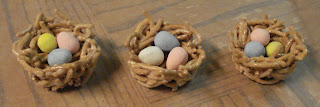
Bird Nests   So I was looking for a cute Easter gift for the girls I teach at church. I found this adorable little bird's nest!

Nest all wrapped up   Here are the instructions for making the nest.

Bird's Nest
Ingredients:
   2 cups miniature marshmallows
   ¼ cup butter
   1 (6-ounce) package chow mein noodles
   36 Mini Cadbury Eggs (or any egg shaped candy)

Place the chow mein noodles in a large, plastic mixing bowl and set aside.

Butter each cup of a 12-cup muffin pan.

Place the butter in the Pampered Chef large micro-cooker (or you can use any medium sized microwaveable bowl), and microwave until melted (about 60 seconds). Add the marshmallows to the melted butter and microwave for about 45 seconds. Remove from the microwave and stir marshmallows and butter together until smooth and mixed well. (Use a plastic scraper or spoon to do the stirring, so the marshmallow doesn't stick as much.)

Pour the marshmallow mixture over the noodles, and fold gently until all the noodles are coated evenly.

Butter your fingers, and press mixture on bottom and up sides of each buttered cup leaving a well for eggs. Place 3 Mini Cadbury Eggs in each nest. (It looks better if you use three different colored eggs.)

Refrigerate at least two hours or until firm. Remove from refrigerator. Let nests sit at room temperature for about 10 minutes; remove nests from cups.

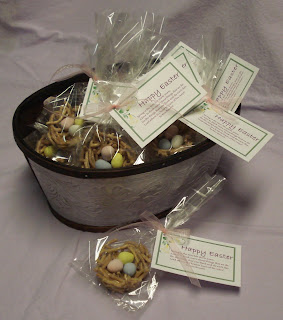
Nests ready to remove   I placed my nests in a cellophane bag with a twist tie. I wanted to have a cute poem or saying attached, but could not find the right one... so... I wrote my own.

Spring is the time life starts anew,
A time to think more about things that we do.
Do the things that you think and do each day,
Lead others to Christ to learn of His ways?
∼ by Kim Bennett ∼

   I think the poem was the perfect touch to make this gift special!! You can print out the tags I made with the poem here.

   These are so cute! I can't wait to give them to my girls!

Basket of GiftsNotes:
If you want to make the nests using the stove top, combine marshmallows and butter in 2-quart saucepan; cook over low heat, stirring occasionally, until melted (6 to 8 minutes). Stir in noodles until very well coated. Proceed as above.