Tuesday, August 24, 2010

Scripture Story Kits

   I wish I could take credit for this fun kit, but the idea came off of sugardoodle.net. I did, however, take the idea and put it to paper... literally. I am including the downloadable files that I created to make the kit. This is a great idea to aid in scripture study as a family!
   Each kit contains two cards. The cards contain a list of items found in your bag, i.e. kit. One person picks an item out of the bag, and then finds it on the card. Next to the item is a story or event from the scriptures along with the scripture references to read about it.
   My children had so much fun looking for the items on the list to include in the bag. I was surprised at how many items they found! For those they couldn't find, we just used clipart printed onto cardstock, cut each item out, laminated them, and cut each item out again.
   These are very inexpensive to make and make wonderful gifts for families with little ones. They are even great for grandparents to have when the grandkids come to visit!
   I do plan to include some pictures soon with more detailed instructions for making the drawstring bags to hold the cards and items. There are brief instructions included in the kit files for making the bags. Be sure to read the instructions in the kit file about printing!

    Clipart for Scripture Story Kits
    Bible Story Kit
    Scripture Story Kit - LDS Edition

   We already had one family night activity using our Scripture Kit and it was a huge success! We had some great teaching moments with our children. I hope you will find this beneficial for those special children in your life as well.
    

Sunday, August 15, 2010

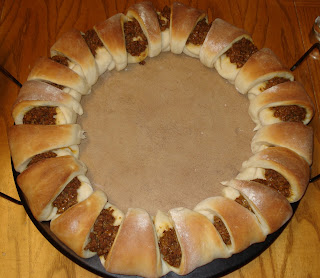
Taco Ring


Taco Ring   So this is another family favorite! This was inspired by a Pampered Chef show a while back. My kids love tacos and rolls, so it just made sense to put the two together in a fun way.
   These are great leftover and a fun, different thing for the kids lunches for school!
   You can use 2 cans of store bought crescent rolls for this, but it is way better if you use my 60 Minute Dinner Rolls recipe. I always double the recipe of rolls to make this ring.

Taco Ring
Ingredients:
   2 Recipes of 60 Minute Dinner Rolls
   1 pound of ground beef, browned and drained
   1 packet of Taco seasoning
   ¾ cup of water
   1 cup cheddar cheese, finely shredded
Prepare 2 batches of 60 Minute Dinner Rolls.
While dough is rising, prepare beef and drain. Add taco seasoning packet and ¾ cup of water and simmer on low.
Beef mixture simmeringOnce dough has risen, half dough and then continue following instructions for making rolls, but do not brush with butter. After cutting first half of dough into 12 wedges, place the first roll on a round baking stone (I use a 15" stone) so that it is partially off the stone and the point of the wedge is hanging off the stone.
Place first roll on the stoneContinue to place rolls on the stone around the edge, but overlap them slightly, and press down where they overlap to join them together a little better.
Continue overlapping rolls around stoneWhen you run out of wedges, roll out the other half of the dough and repeat until your circle is complete. I never use all the rolls. It usually takes about 18 rolls to make a circle, but it will depend on your stone size and how much you overlap them.
Complete circle of rollsAfter your circle of rolls is complete, remove beef from heat and add cheese.
Add cheese to beefWork quickly after adding the cheese to the meat.
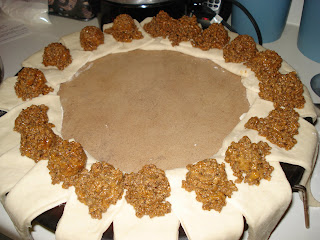
Mix cheese & meat together quicklyUse a small cookie scoop (1 tablespoon), to measure beef mixture. I usually scoop it up the side of the pan to really press the meat together to hold it's shape.Use a small cookie scoop to measure beefPlace one scoop of meat onto each roll. I usually have more meat left, so I go back around the circle filling in any bare looking spots.
Place a scoop of meat on each rollNow grab the pointed end of a roll and wrap it around the beef.
Wrap roll around beefTuck the pointed end under the inside of your ring.
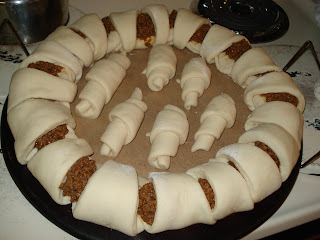
Tuck point of roll under inside of ringContinue until all rolls are wrapped and tucked.
Repeat for all the rollsAs I said earlier, I usually have a few extra rolls, so I just roll them up (without butter) and place them in the center of the ring to bake.
Extra rolls are put in the centerNow cover the entire ring with a towel and place in a warm place to rise (about 10 minutes). Also, preheat your oven to 350 degrees F.
Cover and let riseOnce rolls are about doubled in size, they are ready to bake.
Risen ringBake for about 20 minutes until the ring is a nice golden brown.
Baked ringSlice between each roll.
Slice between rollsAnd serve!
ServeI hope your family enjoys this one as much as mine does!

Thursday, August 12, 2010

Frozen Blueberries

   My children and I have been blueberry picking several times this summer. They don't love to pick the berries, but they sure love to eat them. They love them straight from the freezer!
   The proper way to freeze blueberries, so to pick them, place them in freezer Ziplock bags, and put them in the freezer. That's right... you don't wash them.
   When you are ready to use the blueberries, just wash them off. They thaw very quickly, especially after being washed. I do like to dry the berries if I'm adding them to a dough or batter of some kind. I just pat them dry with a paper towel.
   So go pick some blueberries and enjoy them all year! Just be sure to remind your children (and husband) to wash them before eating them straight from the freezer!

Chocolate Chip Cookies


Chocolate Chip Cookies   I have discovered the perfect after school treat... hot from the oven homemade cookies! No, I haven't been baking a batch of cookies every day, but I did bake several batches, and freeze the unbaked cookie dough balls. Now when it is almost time for my children to be home from school, I bake one pan of cookies. Easy as pie, I have hot fresh cookies.
   So instead of dragging up the hill after school, my children race up the hill to get to the cookies first!
   We have found that we like the cookies better when made from the frozen dough balls. The centers are a little softer and gooey! Check out the instructions under the "Notes" at the end of the recipe to learn how to freeze your cookie dough balls.

Chocolate Chip Cookies
Ingredients:
   ½ cup butter
   ¼ cup sugar
   ½ cup brown sugar
   1 teaspoon vanilla
   1 egg
   1 teaspoon soda
   1¼ cups flour
   1 cup milk chocolate chips
   1 cup chopped nuts
Preheat oven to 375 degrees F. Cream together butter and sugars. Add vanilla, eggs, & soda and mix well. (If using unsalted butter, add ¼ teaspoon salt.) Add flour and mix well. Stir in chocolate chips and nuts. Drop dough by tablespoon (small cookie scoop) on ungreased cookie sheet. Bake at 375 degrees for 9 to 10 minutes, or until golden brown. Makes about 30 cookies.

Baked Chocolate Chip CookiesNotes:
   You can make a "pizza" (or cake) cookie by placing all the dough on a parchment covered 15 inch baking stone. Spread dough out until it is about ⅜ inch thick. Bake at 375 degrees F for 15 minutes. Makes one cookie. To give as a gift, cut the parchment paper that the cookie is on to fit inside a large pizza box. Remove parchment and cookie and place them in a pizza box. Decorate with frosting and mini M&M's.
   You can also make giant cookies with the large (3 Tbsp) cookie scoop. Spread dough out until about ⅜ inch thick. Bake at 375 degrees for 15 minutes. Makes about 10 cookies. These make great gifts! Just wrap each cookie individually with plastic wrap. If you are giving a single cookie as a gift, place a fun circular label with your message in the center of each cookie. If you are giving several cookies, place them in a cute basket and add a bow!
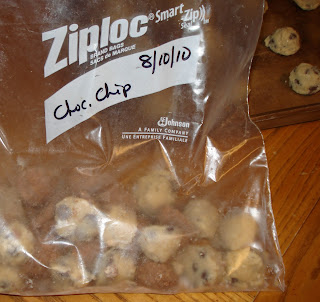
   You can freeze cookie dough balls prior to baking. Place balls on a tray lined with parchment paper. Place tray in freezer until balls are frozen solid. (A deep freezer works much faster than the regular freezer.) Place frozen balls in a gallon freezer Ziplock bag removing as much air as possible and label it.

Frozen cookie dough ballsThese will be good for about 6 weeks in the freezer. When ready to bake, place frozen balls on cookie sheet.
Frozen cookie dough balls on the baking panBake at 375 degrees for 13-15 minutes, or until golden brown.

Peanut Butter Quickies


Peanut Butter Quickies   One of my favorite cookies from when I was younger was Peanut Butter Quickies. I loved to make them and still do! They are a family favorite for my children as well.
   This cookie is not baked, but cooked on the stove. It is very important to have your ingredients you will use at the end of cooking ready before you start to cook, so read through the instructions before starting to cook.
   Also, I can't stress enough how important it is to STIR CONSTANTLY when cooking these! I usually get one of my children to stir for me. I give them a wire whisk and tell them to be sure they stir all around (covering every part of the bottom of the pan) and tell me as soon as they see bubbles. Cook time is also important. Do not overcook these! You will have crumbly balls if you do.

Peanut Butter Quickies
Ingredients:
   1½ cups quick-cooking rolled oats
   ½ cup chopped pecans
   ¼ teaspoon salt
   ⅔ cup peanut butter
   1 teaspoon vanilla extract
   1½ cups sugar
   ¾ cup flour
   ½ cup butter
   ½ cup milk
Place oats, salt, and nuts in a bowl and set aside. Place peanut butter in measuring cup and set aside. Have vanilla and teaspoon ready and set aside.
In another bowl, combine sugar & flour and set aside.
In a large saucepan, melt butter over medium heat. Add milk and sugar/flour mixture. Stir constantly with a whisk and bring to a full boil; boil hard 3 minutes, continuing to stir constantly. Do not overcook.
Remove from heat; working quickly, add peanut butter and vanilla and stir well. Add oat mixture and stir well with a spoon. Don't use a whisk here, as it will get all clogged in the whisk.
Drop by tablespoon (small cookie scoop) onto parchment or wax paper. The cookies will spread out a little, but this is OK. Just let them cool completely to room temperature. Once cookies are cool, roll each cookie into a ball.
Makes 54 cookies.

Notes:
I prefer crunchy peanut butter when making these.
You can leave the nuts out if you want or even use a different kind of nuts, but I like them with the pecans.
If I'm in a hurry, I will melt my butter in the microwave to speed things up.
Be sure to work quickly once you remove these from the burner. They will set up quickly, so get them onto the parchment right away.
After your balls are finished, you can roll them in ½ cup of flaked coconut.

Thursday, August 5, 2010

White Sauce

   This is the basic sauce that I use for most of my sauces (or gravies). I use it when making scalloped potatoes, tuna gravy for toast, sausage or hamburger gravy for biscuits. I make it with chicken broth instead of milk for my chicken pot pie. I often add Velveeta cheese for a cheesy sauce. My husband likes the cheese sauce on his biscuits. When I make my roast beef gravy, I use the beef juices instead of the milk. This recipe is very versatile.

White Sauce
Indgredients:
   2 tablespoons butter
   ½ teaspoon of salt
   ⅛ teaspoon of pepper
   2 tablespoons of flour
   1 cup of milk

Melt butter in small saucepan. Add salt and pepper, and stir until dissolved. Remove from heat and add flour. Stir until smooth. I like to use a whisk for this. Gradually add milk and stir constantly to prevent lumps from forming. Return to heat and stir constantly until sauce begins to boil. Otherwise, continue stirring until thick (about 2 to 3 minutes).
Makes 1 cup.

Notes:
If making for scalloped potatoes or chicken pot pie, remove from heat as soon as it begins to boil.

Wednesday, August 4, 2010

60 Minute Dinner Rolls


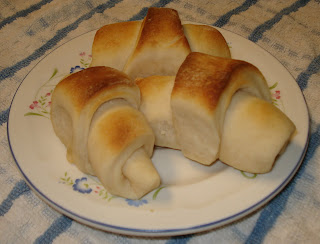
Dinner rolls   Of all my recipes... this is the one I use the most! My family and I love bread, so this is a perfect recipe. Hot rolls in only 60 minutes... from start to finish.
   I got this basic recipe from a friend years ago before I was even married. The one thing that I noticed was that the rolls were very good right after they baked, but the leftover rolls were always a little dry. So the only change I made was to use honey instead of sugar. Now my rolls are yummy even when leftover... even though we rarely have leftovers.

60 Minute Dinner Rolls
Ingredients:
   4 Tablespoons butter, divided
   ½ cup milk
   ½ teaspoon salt
   1½ Tablespoons honey, divided
   1 package yeast
   ¼ cup water (lukewarm)
   2 to 2 ½ cups flour
In mixing bowl, combine ½ Tablespoon of honey, yeast, and lukewarm water. Let yeast begin to rise.
Yeast mixtureIn a separate bowl (or saucepan), mix together 2 Tablespoons butter, salt, and 1 Tablespoon of the honey. Cook or microwave until butter is melted and salt dissolved. Stir mixture to be sure salt is dissolved. I usually microwave (covered) on high for about 60 seconds. I then add my milk and heat until lukewarm (30 seconds in the microwave). Be sure mixture is lukewarm. (You can add 1 or 2 ice cubes to speed up the cooling process if you get it too hot.)

Add cooled butter mixture to yeast mixture and stir.

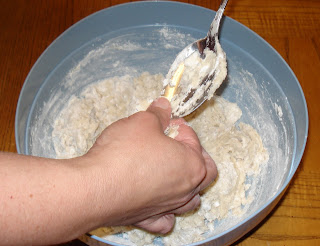
Add about 2 cups of the flour and stir with spoon.
Stir in flour until you can no longer stirBegin kneading dough in bowl; adding a little flour as needed.
Knead in bowlFinished kneading in bowlPlace dough on lightly floured surface and continue to knead dough.
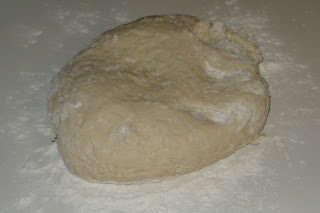
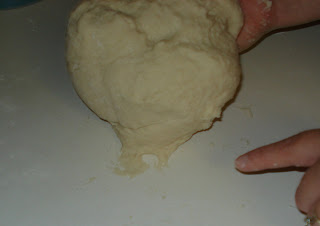
Place dough on floured surfaceKnead by pressing with heelAfter pressing with heel, fold dough over in halfThen press again with heelFold dough over again...keep repeatingContinue kneading until it no longer sticks to counter, but is still sticky and soft to touch.
Dough is soo stickyDough is ready - not too stickyPlace back in bowl.
Place dough back in bowlCover and let rise 20 minutes (or until doubled).
Cover bowl and let riseDough is doubledPunch down dough.
Punch down doughPlace dough on lightly floured surface.
Place dough on floured surfaceAnd roll into a large circle.
Roll dough into large circleMelt 2 Tablespoons of butter in microwave. Using pastry brush, brush circle of dough with part of the melted butter.
Brush with melted butterUse a pizza cutter to cut circle into 12 wedges.
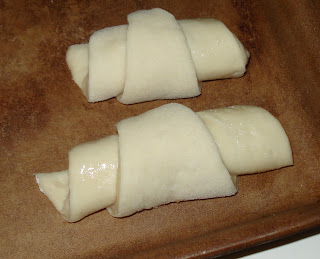
Use pizza cutter to cut doughCut into 12 wedgesRoll each wedge from outside edge of circle to center to form crescent shaped rolls.
Roll from outside edge to inside circleRoll all rolled upPlace rolls on greased baking sheet (or ungreased baking stone) so that the point of the wedge is on the under side.
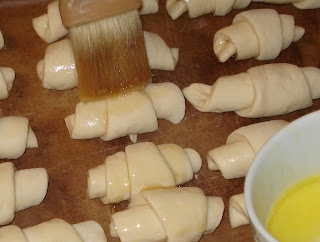
Place rolls on pan with point of wedge underneathBrush tops with the remaining melted butter.
Brush tops with melted butterCover and let rise 10 minutes.
Cover the rollsRolls coveredBake at 400 degrees for 8 to 10 minutes or until tops are brown.
Baked rollsMakes 12 rolls.

Notes:
Each roll is 3 Weight Watchers points.
One recipe of dough made with all white flour is 29 WW points.
If using whole wheat flour, 1 c. is 4 pts. instead of 8 pts. for white flour.